Regular oil changes are essential to maintain your vehicle’s performance and longevity. At Mr. MechaniQ, we understand the importance of proper engine maintenance. In this guide, we’ll walk you through the 10 essential steps to change engine oil, ensuring your car runs smoothly and efficiently.
Step 1: Gather Necessary Tools and Materials
Before starting, ensure you have the following:
New engine oil (refer to your owner’s manual for the correct type and amount)
New oil filter
Oil filter wrench
Socket wrench set
Oil drain pan
Funnel
Gloves and safety glasses
Jack and jack stands or ramps
Clean rags or paper towels
Having all tools ready ensures a smooth and efficient oil change process.
Step 2: Prepare Your Vehicle
Park your car on a level surface and engage the parking brake.
If necessary, raise the front of the vehicle using a jack and secure it with jack stands or ramps.
Ensure the engine is turned off and has cooled down to avoid burns.
Safety is paramount. Always ensure the vehicle is securely supported before working underneath.
Step 3: Locate the Oil Drain Plug and Oil Filter
Consult your owner’s manual to find the exact location of the oil drain plug and oil filter.
Typically, the drain plug is located at the bottom of the oil pan, and the oil filter is mounted on the engine block.
Knowing their locations beforehand will streamline the oil change process.
Step 4: Drain the Old Oil
Place the oil drain pan beneath the drain plug.
Using a socket wrench, carefully loosen and remove the drain plug.
Allow the old oil to drain completely into the pan.
Once drained, replace and tighten the drain plug securely.
Be cautious as the oil may still be warm. Dispose of the old oil responsibly.
Step 5: Remove the Old Oil Filter
Position the drain pan beneath the oil filter.
Using an oil filter wrench, turn the filter counterclockwise to remove it.
Ensure the old gasket comes off with the filter.
Clean the mounting surface with a clean rag.
Proper removal prevents potential leaks and ensures a good seal for the new filter.
Step 6: Install the New Oil Filter
Apply a thin layer of new oil to the gasket of the new filter.
Screw the new filter onto the engine by hand until it’s snug.
Do not overtighten; hand-tight is sufficient.
Lubricating the gasket ensures a proper seal and makes future removal easier.
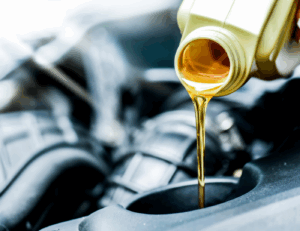
Step 7: Add New Engine Oil
Remove the oil fill cap on top of the engine.
Using a funnel, pour the recommended amount and type of new oil into the engine.
Replace the oil fill cap securely.
Refer to your owner’s manual for the exact oil specifications and quantity.
Step 8: Check for Leaks
Start the engine and let it run for a few minutes.
Inspect the area around the oil filter and drain plug for any signs of leaks.
If leaks are detected, turn off the engine and address the issue before proceeding.
Ensuring there are no leaks is crucial for engine health and safety.
Step 9: Check the Oil Level
Turn off the engine and wait a few minutes to allow the oil to settle.
Pull out the dipstick, wipe it clean, reinsert it fully, and then remove it again to check the oil level.
Ensure the oil level is within the recommended range.
Maintaining the correct oil level is vital for optimal engine performance.
Step 10: Dispose of Old Oil and Filter Properly
Pour the used oil into a sealed container.
Place the old oil filter in a plastic bag.
Take both to a local recycling center or auto parts store that accepts used oil and filters.
Proper disposal protects the environment and complies with local regulations.
Trust Mr. MechaniQ for Professional Oil Change Services
While changing your engine oil at home is feasible, entrusting professionals ensures precision and peace of mind. At Mr. MechaniQ, we offer:
Expert oil change services using high-quality products
Comprehensive vehicle inspections
Friendly and knowledgeable staff
Convenient appointment scheduling
Visit us at 359 Enford Road UNIT 3, Richmond Hill, ON, or call 905-780-0123 to schedule your next service.